We’ve all got them. A stash, the “lead mountain”, “the cupboard (insert larger storage device if required) of shame”. Vast piles of miniatures we HAD to have. Then the next big thing came along, and we couldn’t resist. Those unpainted miniatures can be a bit of a burden, so we have decided to do a quick article on how to get your models ready for the tabletop in a short amount of time and with very simple techniques.
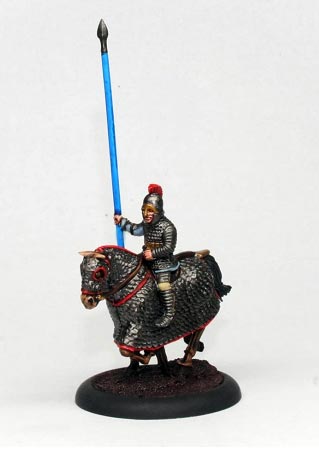
The following is a guide in how to paint one of our new plastic Late Roman Cataphracts. However, all of the techniques shown are transferable to any miniature, and we will be doing more of these guides over the coming months.
We have broken the guide into four steps. You can complete as many of them as you like and still get your army ready for the battlefield. The more steps you do, the higher quality the end result, although even just Step one and basing will be perfectly acceptable for gaming if you want to get an army finished quickly.
First off, assemble the miniature and clean off all mould lines and flash. Use PVA to glue a sprinkling of sand to the base, and, once dry, undercoat the miniature in white.
We are using white as an undercoat so that the colours we apply will cover the area in a single application and have an inbuilt element of highlighting and shadows as part of the process.
The majority of the paints used in Step One are Games Workshop Contrast paints. They are best when mixed at roughly 2:1 paint to Contrast Medium. For the remaining Steps, the paints are from Vallejo.
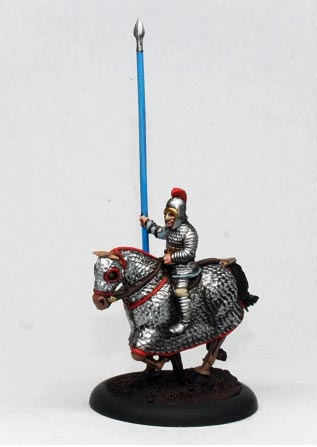
STEP 1
The main bulk of the miniature is made up of metallic plates and chainmail so it is best to start here.
Apply the gunmetal over all metallic surfaces that you do not want to be gold later on. Take it slowly and be careful not to stray onto other areas of the miniature. If you do, wait for the silver to dry, and then touch up any mistakes with white.
Once you have done that, go back and block in all the remaining colours. Remember to take your time and use a smaller brush for any of the fiddly details.
- Silver - Vallejo Air Metal Gunmetal
- Gold – Vallejo Brass
- Horse - Contrast Wyldwood
- Horse’s Hair/Hooves – Contrast Black Templar
- Barding trim – Contrast Blood Angel Red
- Brown leather – Contrast Cygor Brown
- Kontos – Contrast Talassar Blue
- Skin – Contrast Gulliman Flesh
- Tunic – Contrast Gryph Charger Grey
- Trousers – Contrast Skeleton Horde
At this point, you could simply base your miniature and get them on the tabletop. If you want to get a bit more detailed, keep following the steps.
STEP 2
With our basecoats applied we can now increase the contrast of the miniature and help bring out the details with a layer of highlighting.
When applying these colours focus them on the raised surfaces, such as the tops of folds in material, the edges of belts, and details like the nose, cheeks, and chin.
- Silver - Vallejo Silver
- Gold – Vallejo Gold
- Horse – Vallejo Cork Brown
- Horse’s Hair/Hooves – Vallejo German Grey
- Barding trim – Vallejo Vermillion
- Brown leather – Vallejo Cork Brown
- Kontos – Vallejo Magic Blue
- Skin – Vallejo Basic Skin tone
- Tunic – Vallejo Pale Blue
- Trousers – Vallejo Buff
STEP 3
Now you can add a further layer of highlights to really boost that contrast in the same way as the previous step. These highlights are smaller than the previous layer so it best to use a smaller brush like a size 00.
It is also at this stage that I like to apply a wash of Contrast Black Templar to the Silver and black areas to blend the previous layers together.
- Silver – Contrast Black Templar
- Gold – Vallejo Silver
- Horse – Vallejo German cam. Pale Brown
- Horse’s Hair/Hooves – Contrast Black Templar
- Barding trim – Vallejo German orange
- Brown leather – Vallejo German cam. Pale Brown
- Kontos – Vallejo Sky Blue
- Skin – Vallejo Light flesh
- Tunic – Vallejo Pale Blue grey
- Trousers – Vallejo Ivory
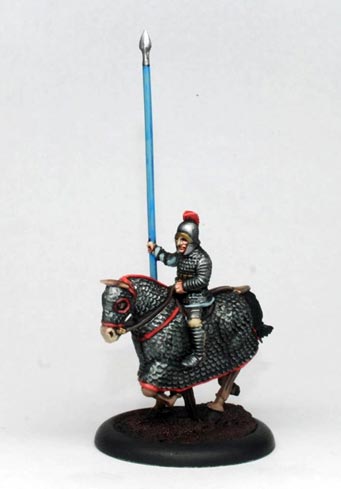
STEP 4
At this stage it is good to go back and add a few extra shadows to increase the contrast and separate out each area of the miniature. Using a dark grey or black, paint into the deepest shadowed areas or gaps between each element, such as the detailing on the weapons, or areas between the red barding trim and the horse armour. Take your time with this and stick to that smaller Size 00 brush.

Basing
Finally, you can base the miniature to match your chosen game and setting. In this case I have gone for a dark earth colour and applied a solid basecoat followed by a lighter brown drybrush. To add more colour and texture to the base I have also added a few grass tufts. Apply a layer of varnish to the miniature and you are ready to crush your foes on the tabletop… hopefully!